
WINDOWS · LINUX · APPLE MAC
How to change a camera IP address or enable DHCP
SADPTools can update the network settings of a compatible activated Hikvision device found through local SADP discovery. You need its current administrator password and the correct network settings for the site.
Download SADPTools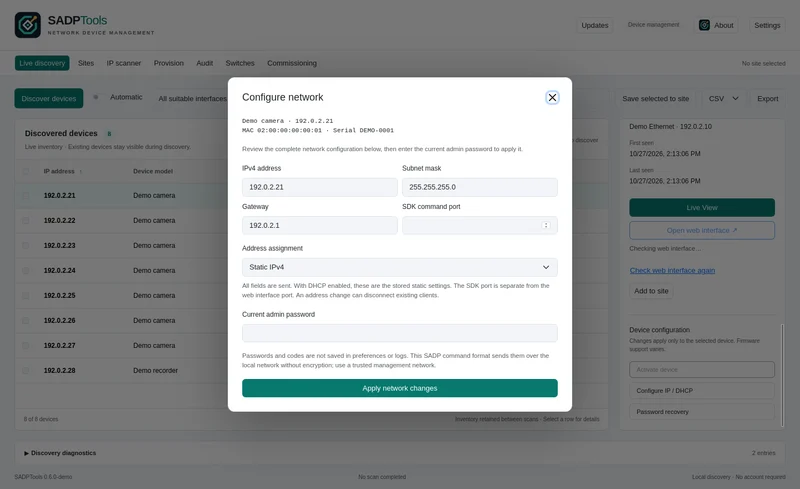
Plan the address before changing the camera
Record the existing IPv4 address, subnet mask, gateway, DHCP state and SDK command port. Agree the new settings with whoever manages the network. Check address reservations, the DHCP pool and known assignments. A failed ping or a silent scan is not proof that an address is free.
Changing an address can interrupt an NVR, video management server, Live View session or other client. Plan how those clients will reach the camera afterwards. An inactive device first needs activation.
Use the network-configuration form
- Discover and select the camera. Confirm the MAC address and serial number, then finish or stop discovery before starting a write.
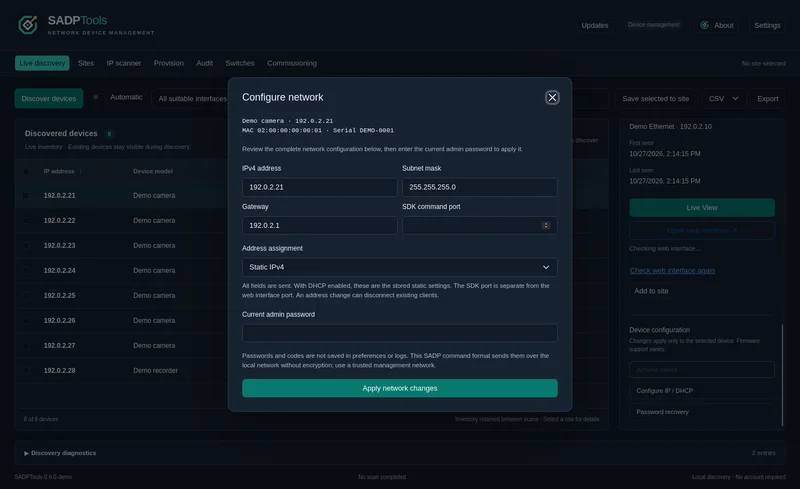
- Choose Configure IP / DHCP in device details. The Configure network dialog uses values from the camera's discovery reply. Missing fields stay empty; do not assume an empty field is a valid default.
- Review the complete configuration. Enter the intended IPv4 address, subnet mask and gateway. Confirm the SDK command port separately from the camera's HTTP, HTTPS or RTSP ports.
- Select static addressing or DHCP. If DHCP was not advertised, make an explicit choice. When enabling DHCP, the form still sends the stored static address settings, so those fields must also be valid.
- Enter the current admin password. Check the camera identity and settings again. Normally the discovered adapter is chosen automatically; Connection options allows an override if more than one adapter saw the device.
- Select Apply network changes once. Read the acknowledgement, rejection or unconfirmed result. There are no automatic retries.
- Choose Close and rediscover. Locate the camera by MAC and serial, check its newly advertised configuration, and open the detected web interface once routing permits it.
What each field means
- IPv4 address
- The intended static address, or the stored static value sent with a DHCP request. Choose an address appropriate for the camera's network.
- Subnet mask
- Defines the local IPv4 subnet. Use the site's actual mask.
- Gateway
- The router used for destinations outside that subnet. The form supports
0.0.0.0to mean no gateway when that is the intended configuration. - SDK command port
- The device's SDK service port. This is not its web-interface port. Preserve the advertised value unless the installation calls for a deliberate change.
- DHCP
- Allows a DHCP server to supply the camera's address where supported. Rediscover or consult the lease table to find the assigned address.
If the new address is not reachable
A successful SADP reply and browser reachability are separate checks. Confirm that your computer can route to the new subnet and that the network permits the camera's services. Check the camera's mask and gateway and any recorder configuration affected by the change.
If the operation timed out, inspect the device's current state before resending. Cancelling the wait cannot reverse a change already made. Use the different-subnet guide when the route works but local discovery does not.
Update the saved installation
Keep the verified address with the saved site, and update clients that reference the old IP. Review any imported stream addresses that still refer to the old address. Export the site when the updated inventory needs to travel to another laptop.